How to Change Visibility Settings and Add Passwords in Crezlo Flipbook?
When you create a Flipbook in Crezlo, you control who can view it by setting the visibility. You can also add password protection for extra security. This guide walks you through the process.
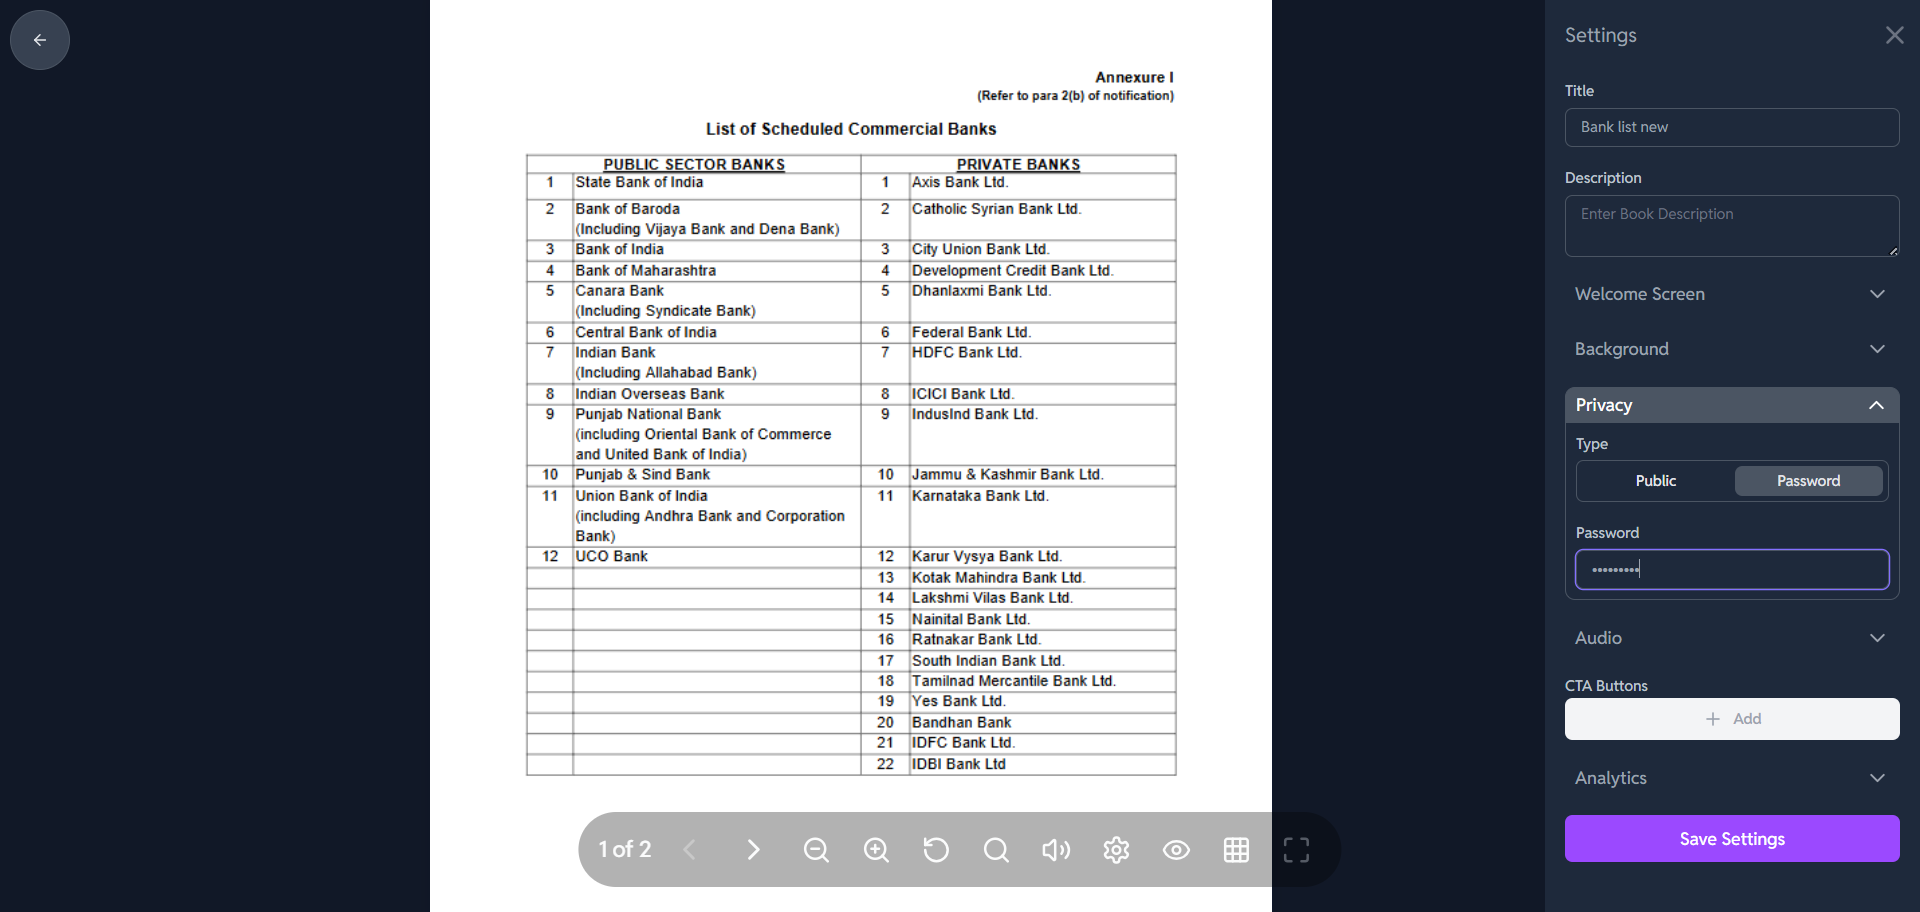
🔒 How to Customize Privacy Settings in Crezlo
-
Locate the "Privacy" Section:
- The "Privacy" header is expanded
-
Choose the Visibility Setting:
-
You have two main choices for controlling who can access your flipbook, presented as buttons:
-
Public: Select this if you want anyone with the link to be able to view the flipbook. This is the default and makes sharing very easy.
-
Password: Select this if you want to restrict access. Only viewers who have the correct password will be able to open the flipbook.
-
-
-
Set the Password (If "Password" is selected):
-
If you click the "Password" button, the field below, labeled "Password" (with the placeholder text Enter password), becomes active.
-
Type in the unique password you want viewers to use to access your flipbook.
-
-
Save Your Changes:
-
Once you have selected either Public or Password (and entered a password if applicable), scroll to the bottom of the right-hand panel.
-
Click the purple "Save Settings" button to apply the new privacy rules to your flipbook.
-
Adding Password Protection
For sensitive or limited-access flipbook, Crezlo lets you add a password.
-
Open the Flipbook Settings.
Navigate to the flipbook you want to secure. -
Enable Password Protection.
Toggle the “Password Protect Flipbook” option. -
Set a Strong Password.
Enter a custom password. Use a mix of letters, numbers, and symbols for security. -
Save your changes.
Once saved, viewers will need to enter this password to access your flipbook.Once you have adjusted any of these settings, remember to scroll to the bottom of the panel and click the "Save Settings" button.